Showing posts with label green. Show all posts

Saturday, November 14, 2015

Adorable Chicks Layout

Hey everyone!

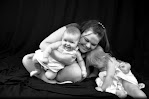
Today I have a layout to share. This is Harmony and our two Ameraucana chicks, Cleo (gold), and Oreo (black/gray). These pics were taken this summer and they're already full grown and well.. Oreo isn't the precious hen I was hoping for... she turned into a lovely rooster lol. They're so adorable together though. Harmony LOVED to hold them any chance she could, and still does if they'll let her (but they won't lol). 
 

I cut the title and other die cuts (chicks hearts etc) with my silhouette cameo. I used pop dots for 2 of the chicks. The rest of the page is adhered with zig 2 way glue and ATG tape. My red and green and gray papers are all scraps. The red feather is stenciled on with a stencil i made with my cameo.


I'm entering this layout into the following challenges:
Picture This - November 1 Challenge (any pics + die cuts + scraps + buttons)
Clique Kits - Anything Goes
Scrap Our Stash - A-L-B-U-M-S (A=Adorable, L=layering, B= button, U=uni-ball pen around feather, M= Main gate october afternoon background paper, S=Stencil (red feather))
ScrapMuch - November color challenge


My Creative Sketches - October Sketch


Thanks for stoppin' by and have a great day!

Wednesday, April 1, 2015

PIcnicing Bo Bunny layout

Hey everyone!

First of all let me say Happy April Fools day!! I'm usually a huge prankster and I always get Adam with something.. but this year I'm just not feeling it or I guess I just haven't had the time. We're taking the girls to the Circus today (they've never been before & I haven't been since I was like 8 so we're pretty excited).. I half-way wonder if he bought the tickets so I didn't have a chance to prank him lol. 

Today I have another layout to share. I used the Bo Bunny Lemonade Stand collection to make this layout. I fussy cut the arrows and the title from one of the Bo Bunny papers. I made the flower using a punch then a green sequin then on top of that a pink pearl. I put the arrows title and flower on pop dots. Everything else is adhered with ATG tape. The pic is Jayden & Harmony with their cousins (my nephews) on Easter 2012. 


I am entering this layout into the following challenges:
Bo Bunny - Sketch


Off the Rails Scrapbooking - April Challenge


Thanks for stoppin' by and have a great day!

Friday, March 15, 2013

1 St Patty's Day layout

Here I have a cute little St Patty's Day layout I made for Tommy's book. I used a few different carts... Simply Charmed for the pot of gold and leprechaun, Noah's ABC Animals for the rainbow, Create A Critter for the clouds, the "1st" is from Cricut Craft Room Basics, "St Patty's day" is from Letter Envy & and welded together with my gypsy and cut with my cricut expression 2. I used green card stock for the background, gold gel pen to make the gold pieces gold.. all other paper is just from my stash.


I'm entering this layout into the following challenges:
Scrappy moms Terrific Tuesday - Luck of the Irish
Exploring Cricut - The Luck of the Irish
Fantabulous Cricut - #152
Die Cuttin' Diva's - #106
My Creative Time - Spring + Die Cut
Wacky Wednesday - #82
Craftin Desert Diva's - linky party anything goes
DL.ART - anything goes

Thanks for stoppin' by and have a great day!

Monday, July 25, 2011

Baby Boy Card


I cut this card base at 5.5 inches using the Life's A Party cart in blue & white plaid card stock. I cut the onesie shape from at the same size from the same cart and inked the outside and inside of the cut with blue chalk ink. And then I cut the "B" at 1inch from the same cart and also inked the edges. I used some pop dots for the "B" and tada! :)

I am entering this card into the following challenges:

Thanks for stoppin' by and have a great day!

Monday, December 13, 2010

Jayden's 1st Birthday Party Supplies!


My little baby Jayden is turning 1 on January 11, 2011! I cannot believe how fast this year went.. Im gonna cry on her birthday I just know it.. (I cry on her month birthdays lol). I have all of this stuff made kind of early (we're doing her party on Jan 1, 2011 so that family can come since we'll be home then). Why so early you ask? Well... we are leaving WY (and my Cricut and all my crafty things) On Dec 12 and won't be back until Jan 5 so I have to get it done now!

This week at SweetSassyDiva DT our challenge was to make party stuff.. (invites, banners, gift bags, cakes etc.)

- What you'll need -
For the invites:
premade cards (I made a total of 19)
blue card stock
bright blue ink pad
hot pink card stock
neon green card stock
purple card stock
black card stock
black Glaze pen
black ink pad
clear accents
Plantin SchoolBook
Create A Critter
Cricut
adhesive
Cuttlebug
divine swirls embossing folder

For the gift bag:
brown gift bag (got mine at the dollar tree 2 for $1)
hot pink cardstock
blue card stock
purple card stock
neon green card stock
black glaze pen
adhesive
double sided foam tape
Create A Critter
Wild West
Cricut

- How To Make It -
The invites:
Cut the blue cardstock to the size of your premade cards (a little smaller than the front) and emboss with the Cuttlebug and Divine Swirls folder. Take your blue ink pad and rub over the blue card stock to give a little dimension to the swirls. Adhere the blue cardstock to the front of the card. With Create A Critter cut some whales and jellyfish (I cut my whales and large jellyfish at 3 inches and my smaller jellyfish at 2 inches). I cut them in pink and purple and saved the green for the tags (its a girl party so I just wanted the green to be an accent). Adhere the whales and jellyfish on the cards (upper middle). With Plantin SchoolBook cut out the #1 using roly poly at 11/4 inch in the green, purple & pink cardstock. Cut some strips of green & pink (they are the ones the words will show best on) approx. 1x4 inches and distress the edges using the black ink pad. Write the sentiment (I had wrote all of mine a stamp or printed version would work just fine) with the black Glaze pen. I just decided to come up with my own theme for Jaydens party, I already knew what I wanted so I didn't have to search for anything. I placed the strips diagonally and put opposite colored 1's over the end of the strip. I then covered the 1's in clear accents to give it the look of water.

The gift bag:
I cut the purple jellyfish at 4inches and the pink whale at 5inches. Adhered them to the bag toward the middle. Cut the strips of waves by the whale by hand and put foam tape on the bottom one to make it pop. I also cut the bubbles by the jellyfish out by hand. Using Create A Critter I cut the "happy birthday" at 2 inches in green, and with Wild West I cut all the other letters and the 1's. I cut the green 1 using shadow at 3 inches and the purple at 3 inches w/o shadow on, and the shadow green "st" at 2inches and w/o shadow in purple at 2inches. Cut "Jayden" in both green and purple at 2 inches (and shadowed them myself using opposites). I cut the "BABY" at 2 inches and the "baby" at 1.5 inches in hot pink. Easy!
I am entering these into the following challenges:
The Invites:

Thanks for stoppin' by and have a great day!

Tuesday, October 19, 2010