Showing posts with label Cuttlebug. Show all posts

Thursday, October 27, 2016

Seasons Greeting DCWV Card

Hey everyone,

I made this card following the October Stack-a-holic challenge at DCWV. I used the Candy Cane Lane stack, red stickles, red ink, pop dots, enamel dots, swiss dots embossing folder and cuttlebug. 


I am entering this into the following challenges:
Simon Says - Anything Goes
DCWV - October Stack-a-holic


Thanks for stoppin' by and have a great day!

Saturday, April 19, 2014

Baby Girl Harmony Layout

WOW... I can't believe its been so long since I last posted on here... time just has a way of getting away. 

Anyway, today I have a layout to share.


For this layout I used mainly DCWV papers. The background paper is some mint cardstock that I just have in my stash. The title was cut with the Silhouette. The buttons were in my stash and I used a button embossing folder for the pink paper behind the pic of Harmony. The green ribbon at the bottom of the pics is from May Arts. 


I'm entering this layout into the following challenges:
Page Maps - my creative scrapbook sketch contest
DL ART - April linky challenge

Thanks for stoppin' by and have a great day!

Monday, May 27, 2013

Echo Park baby layout

Made this layout using the Little Girl line from Echo park..  the gray paper is embossed with a folder from the Word Collage cuttlebug folder set and then inked with pink ink. I followed the challenge over at Page Maps for the sketch and the colors. It was a super hard challenge for me to find a way to make the colors work together.. but I think I did alright. :)


These are the colors

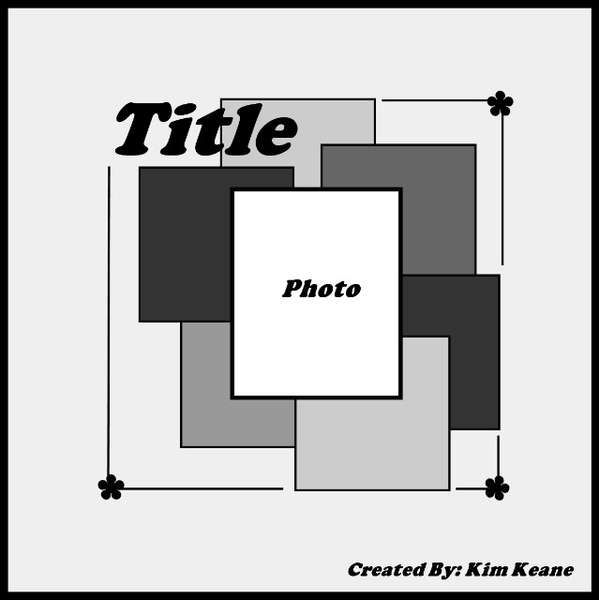
This is the sketch

I'm entering this layout into the following challenge:
Scrapping everyday miracles - #28 (new event: new baby, Old item used: solid papers are over a year old, new item used: the title embellishment & twine are new)

Thanks for stoppin' by and have a great day!


Monday, January 28, 2013

Cousins layout

I made this layout for Adam's Grandparents album I've been working on for awhile now.. It was fairly simple to make.. a little heart bling in each corner and different pattern papers behind the pic. The hardest part was the twine title and that wasn't even very hard!


I made this for the My Creative Sketches January Sketch


Thanks for stoppin' by and have a great day!

Monday, September 17, 2012

MCCR Letter L - love card


The MCCR letter of the day is "L" so I used Sweethearts and Old West carts to make a card that says Love (which starts with L).


I cut the letters out with Old West in light pink. Embossed them with swiss dots and the cuttlebug, and then inked with silver ink. I cut out some different sized rectangles in gray (2 different shades) and embossed one with divine swirls and inked with silver ink, and inked the other around the edges with pink ink. I cut a large rectangle in pink (just a little smaller than the card) and embossed with swiss dots and inked with pink.


For the inside I cut some rectangles in dark pink and light pink and inked each with silver ink. I adhered the dark pink on both sides and bottom (leaving the top open to form a pocket for a gift card, money, check etc.) and put the light pink on top of that. I wrote a message in silver ink on the light pink.


My fav part of the whole card is the blinged out ring. This card was a wedding card so the ring was perfect for the "o". I used sweethearts to cut the ring and cut it in white. I added clear/white stickles to the diamond and yellow to the ring base. I love the color combo. I sent this to my friend who just got married (they had a country style wedding hints the old west font).

To see the rest of the MCCR DT's projects please go to MCCR and check em out!

I'm entering this into the following challenge:
Docerela Creations - Anything goes
DL. ART thankful thursday - anything goes

Thanks for stoppin' by and have a great day!

Saturday, April 21, 2012

Happy Bird-day Card


Made this card for my niece's 4th birthday.


I used create a critter and my gypsy. I ran the house threw the cuttlebug with the swiss dots folder and inked the top with a darker shade of purple ink to make the dots pop out more. I put patterned paper on the roof and cover the roof and hold in stickles. For the bird I put stickles on the wing and popped the wing up with pop dots. The whole bird is on pop dots also.


I am entering this card into the following challenges:

Thanks for stoppin' by and have a great day!


Friday, November 4, 2011

Flashback Friday 17.0


The Flashback Friday challenge going on right now is for the 1st banner you made. And here is mine!


I made this in Nov 2010.. And still love it.. i think it turned out great! And the fact that its Jayden's middle name helps a bit I'm sure :).


Im entering this into the following challenge:


Thanks for stoppin' by and have a great day!

Sunday, September 11, 2011

Halloween Card


Using the sketch at Peachy Keen I made this cute Halloween card. I've been wanting to use this embossing folder for forever.. matter of fact I wanted to buy it the other day cuz I love it so much and was unpacking some scrapping stuff and realized I bought it a loooooong time ago and didnt realize it.. SCORE! lol.


I used my I Rock to put the orange gems down the side.. and I stamped the pumpkin image on the orange paper and embossed with black embossing powder. I wrote the sentiment with Scribbles 3d paint and had the purple paper in my stash. I cannot remember what size I cut everything at.. sorry I need to start paying better attention!


I am entering this into the following challenges:

Now.. I am also sending this card to Madison's I Feel The Love Project for September. Please head over to Madison's blog and check out the I Feel The Love Project, Its so amazing what Madison is doing over there.. This month Madison has asked us to make Halloween cards (that aren't scary and are good for children) and they are being sent to the children at Pediatric Specialty Care (PSC). It's such a great cause and if you're already making cards anyway why not send one to brighten the smile on a child's face :). I only made 2 cards for the project this month.. I might make more but I doubt it since I wont be able to craft for awhile after I have Harmony on Tuesday.. but maybe I will.

Thanks for stoppin' by and have a great day!


Thursday, September 8, 2011

Baby Shower Decore #2


Here is the baby shower banner I made!!! Super cute! I was so happy with how this turned out I cant even begin to tell you all lol.


Used the paper ribbon stuff to string it up. The base of the banner the flower shapes are cut first in chipboard (I used cereal boxes etc) at 4 inches from the Accent Essentials cart. I then cut the shape again on light pink and bright pink card stock. I cut the letters out using Pooh Font cart in shadow first using a tan paper (the same paper I used for the deer on the napkins) and then in light pink & bright pink at 3 3/4 inches. I adhered the pink letters to the tan shadows.


I used some flower stamps and dark pink ink to make my own background on the bright pink paper. I embossed the light pink flower shapes with my Cuttlebug and Swiss Dots folder. I then inked it with a light pink ink to help the dots stand out. I put the letters on (alternating colors so they were opposite their background) using pop dots to help them stand out!


I cut 2 deer from the Create A Critter cart at 6 inches using the same shades of pink and a black shadow. The owl is also using the same shades of pinks and black shadow.. he too is cut at 6 inches and from the Create A Critter cart. I strung up the banner putting the owl between the words and a deer on each side. I used my Big Bite 2 to put some eyelets on all of the pieces so that I could string them easier and faster and they wouldnt ruin the cuts. I have eyelets in the shadow of the deer and owl and strung the ribbon behind the front of the cut so you cant see the holes on them :). Hope you enjoy!!


I am entering this banner into the following challenges:

Thanks for stoppin' by and have a great day!


Monday, November 22, 2010

Noel Banner


This was my very first attempt at a banner! I chose Noel because it is my baby girl Jayden's middle name. It was a fairly simple project and it turned out so cute. I altered chipboard coasters from Michaels to make this.

I am entering this banner into the following challenges:
Die Cut Dreams Challenge - #75 (anything but a card)

Instructions: I took 6 sheets of red cardstock and cut them just a little smaller than 4x4 so that they would have a little bit of a green border (the coasters were green when I got them), and I rounded the corners. I adhered the red cardstock to 4 of the coasts. I embossed the other 2 sheets of red cardstock with Devine Swirls and inked over the top with red ink to help the swirls stand out more and adhered them to the other 2 coasters. With the Pooh Font cartridge I cut out the letters NOEL in white at 3.5 inches using Shift & Marker Shadow.. and then I cut out NOEL again with the green dotted paper at 3.5 inches using Shift & Marker and adhered the green letters over the white to help them pop. I then adhered the felt angels on the two coasters with the embossed cardstock and added a red bow on the outer corner. I put a snowman button in the middle of the "O" using foam tape. Using my Big Bite I punched holes in the top corners of all coasters and threaded the green, red, and white ribbon throught the holes. And.. tada.

Recipe:
6 - 4x4 chipboard coasters (Michaels, these had green paper on them already)
6 - approx. 4x4 sheets of red cardstock
approx. 5 feet of white, red & green ribbon
Big Bite
Pooh Font cartridge
Cricut Expression
Devine Swirls Embossing folder
Cuttlebug
Red Ink
green dotted patterned paper
white cardstock
snowman button
felt angel cuts (hobby lobby)
double sided foam tape
ATG gun

Don't forget to enter for a chance to win my Big candy HERE!

Thanks for stoppin' by and have a great day!

Wednesday, November 3, 2010

Get Sketchy Thanksgiving card


I made this card for the following challenge:

I will also be sending this card to the Caring Hearts Card Drive.

Autumn Time card


This is another card that I made for the SweetSassyDiva DT and it too will be sent to the Caring Heats Card Drive.

Recipe:
brown striped paper
dark brown cardstock
tan cardstock - 6 3/8 x 4 6/8 inches
white pre-made card - 6.5 x 5 inches
2 medium google eyes
red Scribbles 3D paint
yellow Scribbles 3D paint
fancy feathers
"Autumn Time" ribbon (from Michaels)
adhesive
Create A Critter (and a Cricut Machine)
Swiss Dots embossing folder(and a Cuttlebug Machine)

I love how this card turned out! I will be entering it into the following challenges:
Army Wife Learns the Cricut - #3