Wednesday, January 25, 2012

Buccaneer Imagine Cart for Sale


Hey Everyone.. I'm selling a brand new Buccaneer Cricut Imagine cart. I have it listed on craigslist you can view it HERE!
Basically, I'm selling it for $35 OBO and thought that if any of my followers were interested I'd let you know about it. If interested email me @: babyblueangel_30@yahoo.com and let me know. If one of you decide to buy this cart from me we'd just do a paypal transaction and I'd ship it within 48 hours of payment. So again... if interested let me know!
Thanks for stoppin' by and have a great night!

Tuesday, January 24, 2012

RRR giveaway

RRR is having a giveaway for their blog anniversary check it out here!

Jayden's 2nd Birthday Party Pt 2

Don't forget to enter for a chance to win a free Cricut cart for my 300 follower giveaway HERE!!

To see part 1 of Jayden's 2nd birthday party go HERE!

I still have not found the pics of the invites, food, the food table banner, thank you cards and pinata but I guess this will turn into a 3 part post. I did however find pretty much everything else.

The Headband - I made this using a headband base from Michaels (clearance for $0.79), Pooh Ribbon from Michaels and the yellow ribbon is from Michaels $1 bin. I glued the yellow ribbon to the end of the base and then wrapped it around the base and gluing again once it was wrapped to the other end. I used my bow easy to make the bow out of pooh ribbon and hot glued it on the headband.

Food Tags - Using my Cricut and the Pooh & Friends cart I cut out Piglet, Kanga & Roo, Rabbit, & Tigger at 4inches. I then folded brown card stock in half to the size I thought good for each individual shape and folded in half to make a card. I then cut each "card" all raggedy on the ends to look like a wood sign. Then I wrote the different food titles on each card in white gel pen to look like it was done by a kid.

Favors - Each boy got a toy car, a ball, a slinky, a pack of pooh themed cards, a pooh puzzle, a pooh finger puppet, bubbles & honey sticks
Each girl got a princess phone lip gloss, 2 bracelets, a slinky, a pack of pooh themed cards, a pooh puzzle, a pooh finger puppet, bubbles & honey sticks
I made a special wrap for the bubbles red paper cut the the same size as the bubble labels with a small pooh die cut (from my cricut & pooh & friends cart), one had a bee die cut & one had eeyore. I also put a pooh cut on the honey sticks. The honey sticks were ordered from Chase Honey Company and came in packs of 8 with 2 of each flavor (10 packs of 8) and I also ordered 10 packs of 8 regular clover honey sticks.

Party favor bags - I cut out the stencil shapes from pooh & friends cart (one of each.. piglet, eeyore, pooh & tigger). Using red bags I placed the stencils on one side of the bag using a tape that I knew wouldn't rip the bags (photo squares that don't really hold) and brushed/ sponged on white paint. I did the same thing for 2 big gift bags using the same stencils. On the little bags I free handed each kid's name on the bottom and put a different design on .. and I free handed "Happy 2nd Birthday Jayden" onto one of the big gift bags.

Napkins - I wrapped plastic silver ware in red and yellow napkins and tied them closed with the opposite color of paper raffia.

"Jayden's Howse" banner to make this I used the Pooh font cart & cut the banner shape from Princess party and strung it up with paper raffia


I am entering these items into the following challenge:

Thanks for stoppin' by and have a great day

Saturday, January 21, 2012

snowman tag

Don't forget about my 300 follower giveaway RIGHT HERE!!!

Made these cute little snowman tags to go on bags of white chocolate fudge & white chocolate pretzels.
I used the snowman cut from the Hello Kitty cart and made the tag long enough to cover the top of the bag (about 4 inches) x 4 inches and folded in half so it was 4x2. I cut the tag shape using Accent Essentials. I inked the edge of the tag and used swiss dots and my cuttlebug to emboss one of the tags. The "there's snowman like you" cut is from Winter Frolic.

I am entering this into the following challenges:

Thanks for stoppin' by and have a great night!!

Wednesday, January 18, 2012

300 Follower Candy!!


Ok guys/gals.. I know I've been promising for awhile to do a 300 follower giveaway and you've all been so patient waiting for the giveaway. Thanks so much for not giving up on me :).

So this is gonna be a simple giveaway, I'm gonna try to stay as far away from complicated as possible!

What is the giveaway? - Stretch Your Imagination Cricut Cartridge ..
This Cartridge is used... I got it used.. I was told it was never linked to a Gypsy.. and I have never used it since I got it so.. I figure I don't wanna waste it and just have it sitting in my collection when I'm sure someone else might actually use it. So from what I know it's used and not linked to a Gyspy (but thats not a promise cuz I don't know how to tell if it's been linked or not.. if it hasn't been.. great for the winner! If it has.. well.. its free to you and you can do with it what you like. :)

How can you win?:
REQUIRED entry: Must be a follower & leave a comment letting me know you are

Extra Entries:
1 entry - post about this giveaway on your blog, come back leave another comment with a link to your post so that I can check it.
1 entry - post about this giveaway on your sidebar, come back leave another comment with a link to your blog so that I can check the sidebar.

That's all! 3 chances to win. All comments need to be left by January 31, 2012 @ 11:59 PM PST to be entered for the prize. I will use random.org to draw a winner sometime on February 1, 2012.

This is only open to US residents unless you would like to pay the extra shipping cost to have this shipped to you if you win.

Thanks for being my followers and thanks for entering my giveaway! Next follower giveaway will be done at 500 followers.

Thanks for stoppin' by and have a great day!

Jayden's 2nd Birthday Party

Dont forget about my 300 follower giveaway RIGHT HERE!!!


So, it's happened... my baby just turned 2 on January 11, 2010, I cannot believe it. My lil big girl.. not only is she growing fast and getting real big, but she's also sooo smart it just blows my mind and on her birthday she went poopoo on the potty chair :).

Jayden loves Winnie the Pooh, ok more like she is obsessed with anything and everything having anything to do with Pooh. So I knew what her birthday party would be... Pooh of course!

I started planning for her party over a month ahead of time (which was very hard for me because she had just switched recently from the Little Mermaid to Pooh and I was worried she was gonna change her mind right before her party).. my husband convinced me that I needed to pick a theme for her party and she would like whatever I did.. so I set the theme. I started my shopping for all the items I'd need I had lists all over and one book that I kept my shopping and to do list in to make sure I had everything.. I wanted to start early so that it didn't get down to the day of the party and I forgot something really important.

The actual party was on Jan 14, 2012. I made most of the items myself with the exception of a few things like the plates, napkins, silverware etc.

A quick note: I am having a very hard time finding the pics for a few items. I will do another post for these items and I'll try to get them all in one.. so sorry about that :( I hate that I can't find the pics but I'm sure they'll show up. Here is the list of items I cannot find pics of and will do another post for:
The invites
Jayden's headband
napkins
Jayden's Howse banner
How about lunch banner
food tags
favor bags
favors
the food
Bee Hive Pinata
Mr Sanders vinyl art (above Jayden's door)
thank you cards

Jayden's Attire:
I made Jayden's pooh headband using a headband from Michaels that was in the clearance for $0.79 & some $1 yellow ribbon that was the perfect color and shine for honey & some pooh ribbon from Michaels for $4 but I used a 40% off coupon on that. With the left over yellow ribbon I tied it around Jayden's red dress that she wore (got it from TJ Maxx for $10). (These pics of her headband are missing too so again.. a later post for better pics)


The decorations:
Banners - "Pooh Corner" is all from SCAL the banner shapes are just triangles & the font is Comic Sans.

"silly 2 year old bear" high chair banner cut form scal.

Party hats - using SCAL & the free file I got HERE I cut these hats out in red & yellow card stock. I then cut the honey pot 2 from pooh font cart (Just for Jayden's hat) I had cut some pooh ears from the same yellow card stock as the rest of the hat & I cut some slits in where I wanted the ears to go & I added some honey on the pot using the drippy goo punch. For the rest of the hats I put 2 stars of the opposite color on each (I cut these with scal at the same time as the hats with the extra space on the card stock). I punched some holes in the hats with my big bite II and tied elastic on. I cut a special small hat for Harmony to wear (which she did for about 3 mins just long enough for some pics but it was too tight and I couldn't leave it on her) and one for Sweetums who for the first time ever ran from me so she didn't have to wear something.

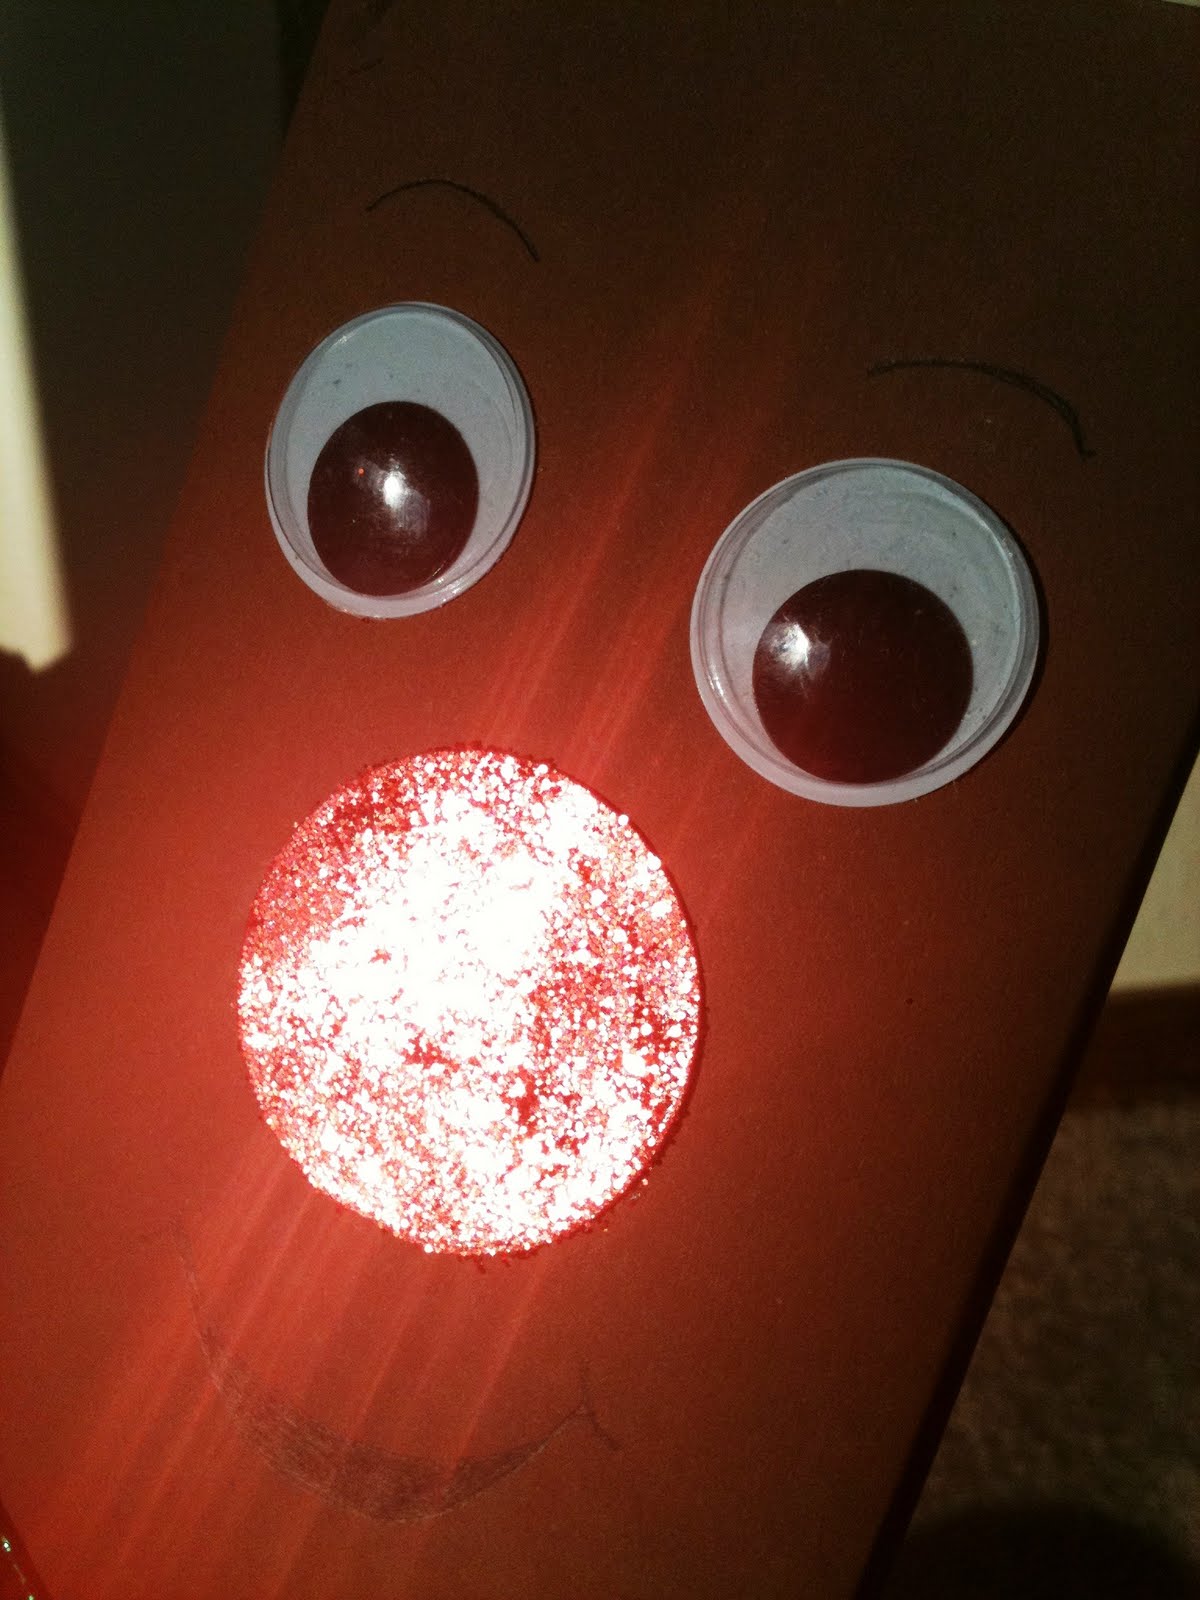
Potty Chair Sign - Jayden's thoughtful spot sign I cut the "wood" background by hand, and cut out the words using pooh font cart and the crass is from the Happy Hauntings cart.
Honey pot - I used a small flower pot and wrote "hunny" on it with a sharpie, I cut some strips of yellow card stock with the drippy goo punch and fringed the top and adhered theme to the top of the pot. I put the extra honey sticks inside and sat it on the food table.


The cookies:
These sugar cookies took me a lil while to make but were possibly my fav thing at the party. I've made these before for Adam's grandparents 50th Anniversary party.. not the same designs or anything but the same recipes. Though they are not perfect I did like the way they came out. I had to order the pooh cookie cutter from ebay it's a 3D cutter but I ended up mainly using the head part and cutting the rest off. I free handed all the cookies and used a food color marker for the face on pooh and the black outlines on the bee wings. These cookies were a HUGE hit.. everyone loved theme.

The cake:
I made cupcakes... these didn't turn out how I had pictured but they did the job. I wanted the cupcakes to look like bee hives. And I made Jayden's cake to match. They were just yellow cake with cream cheese frosting that was colored yellow. I had a couple compliments on my cupcakes the one that meant the most to me was from my brother (he has his degree in pastry arts (cake decorating etc)) he told me it was the best cake he'd ever had he also said he loved the cookies.

The games:
Hunt for red balloons - I cut a bunch of red balloons from my Pooh & friends cart and we hid them around the house.. the kid that found the most won a prize.

Pin the tail on Eeyore - I cut Eeyore as large as I could on my expression from the pooh & friends cart (11.5 in) and only had the pastels for the larger sheets so I cut his black out in black, his main body in purple & his lighter color in purple.. for the body I painted it blue with some fabric spray paint. for his tails I cut part of the main cut for the black out and then canceled the cut after the tail was done so that I didn't waste paper or time. Since there was no easy way to do the rest of the tale I hand cut the rest of it tracing one part as the templet. I put each kids name on the back so that when they played we knew who was the closed.. the closed to the "X" on Eeyore won a prize.

Everyone thought the party looked great (I even got some comments that it looked like the type of birthday party a kid would have in a movie and it looked all professionally done). And Jayden had a blast which was the most important part!

On her actual birthday we took her out to eat at the Olive Garden (we also took her here to eat for her 1st birthday).. We were also gonna take her to Chuck E Cheese to play some games but she fell asleep on the way so we ended up just doing dinner.

Hope you enjoyed my party spread :)

I'm entering this into the following challenges:


Thanks for stoppin' by and have a great day!!


Tuesday, January 10, 2012

Pirate Brithday Card


Cut the pirate card using Life's A Party.. Then I inked the cream colored card stock with brown ink to make it look aged. I think it turned out pretty good.

the name on the front of the envelope i wrote with a red zig marker


And for the back I closed the envelope with a skull sticker (cut from Life's A Party with DCWV Adhesive backed card stock).

I am entering this card into the following challenges:

Thanks for stoppin' by and have a great day!

Candy Bar Cover


Cute Candy bar cover I made (I know I know it's not Christmas anymore lol..) Its pretty simple to make this guy.. just figure out how big you need your paper to cover the candy bar (this is one of the large candy bars) and then glue on some google eyes, then put some ribbon around his neck and hang a jingle bell from it. The antlers are made of pipe cleaners that I cut and then bent into the right shape and the eye brows and mouth I drew on with a black fine point marker.

To make his nose shinny enough so that you could say it glows I took a red circle and put glue over the top and added red glitter then I adhered it to the rest of the cover. Easy, Simple, Fun & super cute!!

I'm entering this into the following challenge:

Thanks for stoppin' by and have a great day!

Present gift card set


Matching gift card holder set of cards I made. Very simple (as most of my projects are lol.. I guess I can't get too complicated with a 3 month old and almost 2 year old).


Green recollections card stock cut in half (8.5x11) and then folded in 3rds how ever you want I guess. DCWV Christmwas paper to cover and I used the opposite of each other's outside on the others inside. Inked the edges.. and put ribbon on to look like a present.


the inside pocket is red card stock cut almost to the edges of the card.. (which I believe is 4.24inchs so the pocket I think I cut at 4in) adhered down with atg tape on the bottom and 2 sides. Then covered in the DCWV paper just slightly smaller than the pocket.


Made the bows on top by tying the bow on one and making a crazy looking bow on the other.. just spun it like flower petals and atg in between each layer.

Thanks for stoppin' by and have a great day!

Pop-up gift card holder set


Just some projects I have from Christmas that I never got to post until now. :)


Thanks for stoppin' by and have a great day!

Thank You Card


Made this blue & pink thank you card using some stamps by Hero Arts & Close to My Heart (not sure which lines I can't remember). Used my swiss dots embossing folder and embossed the blue background sheet.. then inked over it with light pink chalk ink. Inked the edges of the white cardstock with the same pink ink and also stamped the flowers with the same ink. Used blue ink for the thanks stamp and inked the edges in the same color.. the pink thanks tag was cut with Accent Essentials. And to finish it off a white ribbon and bow along the bottom. Hope you like.


I'm entering this into the following challenges:

Thanks for stoppin' by and have a great day!

Monday, January 9, 2012

Some of my Christmas presents..

Well I've been so busy I never got to share all the great things I got for Christmas... Well I've got a minute to type so I'll tell you all.

Adam got me a ton of Cricut cartridges...
Imagine Carts:
country carnaval
best friends
hopscotch

Normal Carts:
Formal occasion
give a hoot
batman
winter woodland
best of 2008
best of 2009
best of 2010
3 birds on parade
elmos party
winter woodland
robotz

Project Carts:
fancy frames
princess party
sweet tooth boxes

Lite/Seasonal Carts:
9 months
gingerbread
happy graduation
luau
fathers day
sugar and spice
winter lace

WOW that's a TON of carts.. easily more than I had put together before :D. My husband is the best! Thats not all.. he also got me a new Expression (to replace the one I have had for over 2 years and is on it's last leg). And.. he also got me a Gypsy!!

Saddly when we opened up the Gypsy and tried to register it it wouldn't turn on.. So the other day adam spent about 30 mins on hold waiting for Provo Craft to actually talk to him.. once they did they sat on the line with him forever telling him how to turn it on and having him do it all (even though he already did) then finally they decided to send me a replacement Gypsy because mine was broken. Well they told him it'll take 5 days to receive the mailing label through email and then I should expect it in the mail in about a month.. Umm ok so thats a month that I don't get to use my gypsy or the 2 carts that come on it.. and they aren't going to do anything for it. So all the rumors I heard about Provo Craft having bad customer service I guess isn't too far off. They didn't even apologize for it not working. Oh well I guess.

I got a lot of stuff for Christmas thow so nothing to complain about.

Saturday, January 7, 2012

Mine is Bigger frame


LOL! Doesn't this picture frame just make you laugh?! See.. there's a story to go with this..
My father-in-law celebrated his 50th birthday recently (sept.) and for his present my husband took him to Alaska for a fishing trip just the 2 of them. Adam goes to Alaska all the time for work (usually 1-2 trips a month)... so he has Alaska air miles .. a LOT! (enough to take me to Hawaii for our anniversary this year... *hint hint* just in case you read this babe lol!!). So anyway he took his dad when he went on one of his trips and it ended up costing him around $500-$600 to take him. Well they had fun and that's whats important. Anyway on their fishing trip Adam's dad caught the larger fish and bought Adam a shirt as a joke that said "Mine is Bigger" lol.

I made the frame based off of the shirt and Adam edited 2 pics from their trip and got them printed for the frame.


The guy in the Orange shirt is Adam (he always wears orange it's his fav color) & the guy in the black shirt is his dad (he always wears black it's his fav color shirt lol)... if you knew them you'd think this was hilarious.. people always joke that Adam's dad's closet it just like Ernest's closet the same pair of jeans and black t-shirt over and over and over lol. I cut the guys from Paper Dolls Dress Up cart & the fish from Create A Critter.


I am entering this frame into the following challenges:
LESSology - #8 (the upcycled item are the fishes they are made from an envelope my husband got in the mail from some credit card company and tried to throw away lol... I don't think so!)


Thanks for stoppin' by and have a great day!

Thursday, January 5, 2012

Name Christmas Bulbs

It's been awhile since I've made a post but I assure you I've been crafting tons and I'll show it all as soon as I have it all done. I'm working on Jayden's 2nd birthday party.. and Im making pretty much everything.. from the cake to the hats.. and lets not forget the invites, the party blowers (kinda), the favor boxes, food, food lables, signs, banners, cookies, the list goes on and on.. and the theme.. well Jayden's favorite of course (but it's a surprise) and I promise to share soon.. her party is the 14th so it'll probably be up by the 20th. As for other crafts I'll try to post some other stuff in the meantime it's just a matter of having the time to post.

In other news we just bought a new couch about 2 days ago, and are going to pick up another one tonight.. :D. Jayden sang a song all by herself for the 1st time on Jan 1st (a song that goes with her party theme), Harmony laughed (I don't mean a little giggle, I mean busted up laughing) for the first time on the 2nd.


Harmony's Pin It


No tutorial needed.. 1) put some pledge floor shine in the bulb. 2) swish it around and make sure to cover the entire inside of bulb. 3) dump out excess floor shine. 4) pour fine glitter into the bulb (I tried some glitter that wasn't so fine and it fell off :(.. so i think fine glitter is better). 5) shake bulb and cover inside with glitter (Jayden did this part and she had a blast!). 6) put on lid... and its done!

Jayden's Pin It


I added vinyl names but these looked great without the names too it just adds a special touch.

Mine. Pin It


I cut our names out of gold vinyl (left over from the stuff I bought for Adams grandparents anniversary party) using my Expression & SCAL 2.0. Peel the names off and stick em on.. sooo easy and it looks great!


Adam's Pin It

Not only was this an easy project.. it was also a fun project Jayden (my almost 2 year old girl) & I could do together (so very kid friendly)... but it was also pretty inexpensive! I had all of these glitters in my stuff already that I bought on clearance last year after Halloween from Michaels.. ($3 for 16 different glitters in a pack), the bulbs I had 3 of them from last year on clearance after Christmas (less than $0.50 each) and 1 from this year ($1), the Pledge floor shine was $3-4 for the bottle that looks untouched... so a total of ... $9.50 for these bulbs (and thats not counting that I have all the stuff to make them again so in the future it'll just cost the price of the bulbs (which I'll be getting on clearance from Michales lol).

As for the 300 follower giveaway.. I'm a tad more busy than I expected to be.. you know with my baby turning 2 and all.. well hopefully I'll have the giveaway posted by the 10th.. that is my goal. I don't wanna forget to thank all of my wonderful followers so please don't give up.. it's coming I promise!!

Thanks for stoppin' by and have a great day!!